I haven’t touched Linux in many years and after seeing Microsoft’s Build this year, I thought it would be a fun project to get into. Some things might seem a given to those used to running Linux, but as I haven’t done this in many years, it’s always wise to document.
Before You Begin
- You must be a Windows Insider (Running Windows 10, updated to version 2004, Build 19041 or higher)
- You should Enable/Install WSL and then upgrade to WSL2 (on docs, I stopped at the Linux distro install. I will continue in this post as I had to do some catching up / learning)
- Don’t forget to reboot and you’re good to go
Install Linux
What Distro/Version?
I did Ubuntu, the most popular, but also really liked Kali for it’s speed. I tried many through my learning phase, figuring out the settings and configurations. I similarly went with a light Desktop Environment (explained later) so I can just get a quick response and get something going.
You can get the Ubunto Distro (and a few others) off the Microsoft Store.
Update Your Distro
The value of installing Ubuntu first is that their documentation is great. You’ll have to keep WSL and your Linux distro, whatever it might be, up to date. So, immediately after install, enter these commands. This will make sure you’ll get your packages up to date and running.
sudo apt update
sudo apt upgrade -y
Install Your GUI/Desktop Environment
I did various installs of Desktop Environments, my first success was with MATE. So, I’m going with that for this documentation.
sudo apt install -y ubuntu-mate-desktop
I chose lightdm (it asks you through install).
To get this GUI to properly display, you’ll need a 3rd party X-Server and to adjust some settings.
Install X-Server
On Ubuntu’s docs, they offered a list of X-Server’s. I tried all but one (Cygwin) and my fave two were:
I went with VcXsrv after awhile as it seemed the most popular in documentations (also known as X Launch). The install has two particular things to pay attention to: Firewall and AC settings. If you want a window view, I also modified a display setting.
On first install, BE CAREFUL WITH POPUPS. When the Firewall popup comes up, before hitting ok, also ALLOW public access. If you forget this, go to Firewall settings, and make it so public AND private settings are allowed for TCP and UDP.
On launch, the default is multi-window, but as i use large, unequal screens, the result was pretty horrid. I wanted a small in screen version. To get this, I chose this setting:

Finally, again with access problems, the third screen needs this adjustment to allow control from your terminal window:

Find and Adjust Display Settings
OK! You have WSL2, Linux, and GUI! Ubuntu’s docs say to run X-Server first, it will detect it and run. This didn’t happen for me. I had to configure .bashrc (also recommended in their docs). To do this you need to know what the IP your WSL is on. You can either do it it programmatically or manually. Either way, you need to edit .bashrc.
Easiest way to edit .bashrc, I found, was to open Linux terminal, and:
nano .bashrc
It’s a simple text editor you down arrow around. Don’t forget to control+x to exit and save.
Programmatic:
export DISPLAY=$(awk '/nameserver / {print $2; exit}' /etc/resolv.conf 2>/dev/null):0 # in WSL 2
Manual:
Find the IP WSL is using:
Do an IPCONFIG on Windows command line and find:

Open .bashrc in Nano text editor (above) and add at the end:
export DISPLAY=192.168.32.1:0
Ready for Launch
You’re ready to test!
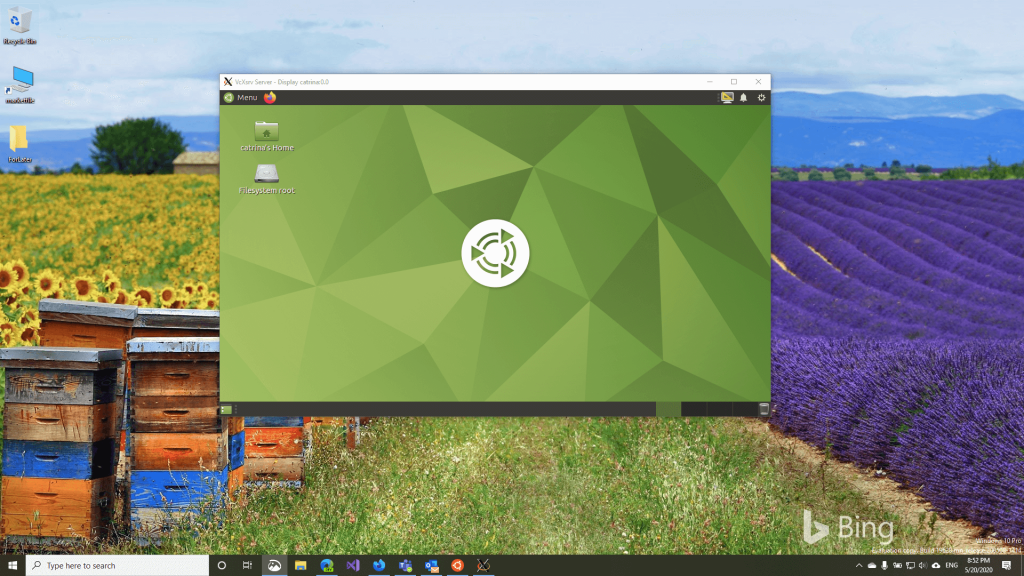
Launch X-Server (it should bring up a blank, black window). Resizing it to liking.
Launch Linux Distro (it should still be terminal view)
Call Desktop Environment:
For MATE:
mate-session
GUI should launch in blank X Server’s blank window.