First Heroku App: Small API in PHP to Talk to .Net Core

I’ve recently been curious about switching to a time API for my time stamps and removing any dependency the app might have on the server for a timestamp.  Upon Googling I found some paid services, some free and of the free ones, I noticed one was hosted on Heroku.  I’ve heard of Heroku, but never had a reason to attempt to use it.  This was the perfect chance.

How I Created a Small “GetTime” API

First, I created a free account on Heroku, nothing special.  After verifying my email, I logged in to my Heroku Dashboard and up on the right hand corner, selected Create New App.  I named it my company-api and out popped an app.

I decided on just plain, legacy PHP and a simple DateTime string passed thru JSON encode, just to get started.  No authentication, no timezone,  just a simple spit out if a request to the site came, like this:

<?php
    header('Content-type:application/json;charset=utf-8');

    $DateTime = new DateTime();
    $currentTime = $DateTime->format("Y-m-d H:i:s");
    echo json_encode($currentTime);
?>

I created a Git repo for this brand new file and pushed it out.  Then, I went back to Heroku, Dashboard, My App and Deploy.  I selected Github as my deploy “resource” and selected the new repo I just made along with correpsonding branch.

I hit manual deploy and Heroku runs off to my GitHub repo, grabs the code, compiles and publishes.

It failed.

Beginner Troubles

My first problem was that Heroku could not determine what language I had chosen for my app (you’d think the <?php would give it away …).  You need either one of two things:  a composer.json file or an index.php file (for legacy, like mine).  I renamed my file to index.php and all I needed now was a “builder pack”.

To add a builder pack, I went back to Heroku, Dashboard, My App and Settings.  Under builder pack, I added one for: “php”.  Save settings and done.

I went back to Deploy, Manual Deploy and had a successful output.  Yay!  First Heroku app!

Adding Some Security

I want to make sure this API is receiving and sending JSON, so there’s a few IF’s I make the request go through before I hit logic on my PHP page.  I also want to (lightly) secure the requests made to this API and monitor our usage of it for metrics information (and future investment).  Since this itty bitty API is just relying on 1 index.php file, I figure this can be a sort of “router” for future API’s.  So, this is what I added to the final PHP file:

  • Verify the request is in JSON
  • Require two variables passed:
    • a secret api “key”
    • an api “request”
  • Use a switch statement to forward to needed method


The final, simple 1 page PHP Heroku API:

<?php
header('Content-type:application/json;charset=utf-8');

//Make sure that it is a POST request.
if(strcasecmp($_SERVER['REQUEST_METHOD'], 'POST') != 0){
    throw new Exception('Request method must be POST!');
}

//Make sure that the content type of the POST request has been set to application/json
$contentType = isset($_SERVER["CONTENT_TYPE"]) ? trim($_SERVER["CONTENT_TYPE"]) : '';
$contentIsJson = strpos($contentType, "application/json");

if ($contentIsJson === false){
    throw new Exception('Content type must be: application/json');
}

//Receive the RAW post data.
$content = trim(file_get_contents("php://input"));

//Attempt to decode the incoming RAW post data from JSON.
$decoded = json_decode($content, true);

$app = strtoupper($decoded['API']);
$key = $decoded['APIKEY'];

//verify user key - simple MD5 generator: http://onlinemd5.com/.  will build user management for keys if ever needed
if ( $key == "BEAF1CB722A3F7758C7A7FA43F6BF2D1" )
{   

    switch ($app) {
        case "TIME":
            $jsonString = getTime();
            $arr = array('datetime' => $jsonString);
            break;
        default:
            $arr = array('error' => "Unknown Request On API");
            break;
    }  

    echo json_encode($arr);
}


//return the current time
function getTime ()
{
    $DateTime = new DateTime();

    //by default heroku returns time in UTC - can change in dashboard, config vars, only use as needed below
    //$DateTime->modify('-6 hours');
    $currentTime = $DateTime->format("Y-m-d H:i:s");

    $jsonString = $currentTime;

    return $jsonString;
}

?>


Verifying the Response

I used Postman to send a raw JSON request to my Heroku app (used their default/free url).  I wanted to make sure all my problems were resolved with this new toy, first, and then move on.  Here’s what the raw request and response look like on Postman:

Heroku + my PHP are responding nicely!

Handling the Request and Response in C#

So here’s how I did the same request and received the response in C# (I use dotnet Core):

public async Task<string> OurHerokuAPI()
{
    string reqUrl = "https://mycompany-api.herokuapp.com";

    using (var client = new HttpClient())
    {
        client.DefaultRequestHeaders
            .Accept
            .Add(new MediaTypeWithQualityHeaderValue("application/json"));

        try
        {

            var query = new
            {
                APIKEY = "BEAF1CB722A3F7758C7A7FA43F6BF2D1",
                API = "time"
            };

            var asJson = JsonConvert.SerializeObject(query);
            HttpResponseMessage response = await client.PostAsync(reqUrl, new StringContent(asJson, Encoding.UTF8, "application/json"));

            if (response.IsSuccessStatusCode)
            {
                var definition = new { datetime = string.Empty };
                var json = JsonConvert.DeserializeAnonymousType(response.Content.ReadAsStringAsync().Result, definition);

                time = json.datetime;

                //monitors success across various "time" api's. in case this particular one fails, there can be various backups until success flag returns true.
                success = true;
            }
        }
        catch (OperationCanceledException)
        {
            //TODO: CREATE ERROR MESSAGE SEND BACK TO EMAIL/ERROR 
        }
    }
    return time;
}


If you see notes, yes, I decided to have some fun and create maybe two other functions, just like the one above, where I query some “free” time api’s until that “success” flag turns true.  After x tries, I reluctantly call my last function, that gets the server timestamp.  As said, I wanted my timestamp to be independent of server.  So, if it hits this last method, I also send myself an error email that the time API is failing.

In the future, I could  use environment variables (config vars) more wisely, instead of hardcoding.  There’s also so much clean up to do, but this was a very fun intro into Heroku!

Continue Reading

Share Azure Blobs with Search and Tree View

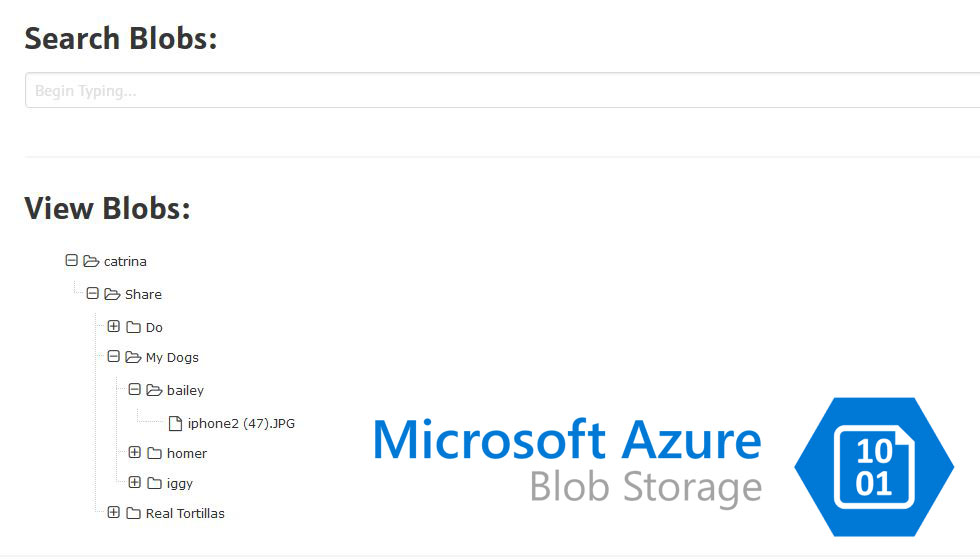
The idea behind this was to create a nice, easy UI that users can download media files they request often.  We moved it to Azure to prevent killing our on-prem bandwidth, but then I had to deal with the flat file structure, etc.  The end result was simply: a fast search of all the blobs (with link) and underneath that, a tree structure of the blobs that they can browse through.

The Set Up

First, I created a Storage container through Azure Portal, then I used Azure Storage Explorer to create a Blob Container under that storage account.  I also set read-only permissions to my blobs by right clicking the container in Azure Storage Explorer, then: Set Container Public Access Level > Public Read Access for Blobs Only.

To make this code work, I needed to setup an environment variable for my connection string.  I used the prefix CUSTOMCONNSTR_ on my variable name as it comes in handy when deploying to Azure Web Apps.  To get the connection string:  Azure Portal > Storage Account you created > Access Keys.

setx CUSTOMCONNSTR_storageConnectionString "<yourconnectionstring>"

Finally, I got a folder I wanted to share and dragged and dropped it into my Container using Azure Storage Explorer.

Tools Used

I used .NET Core to query the container and list the blobs, with segments.  I then looped through that list, creating a formatted JSON string that I could feed to zTree (I preferred the Font-Awesome styling shown here).   I also simultaneously created a list of the blobs into formatted JSON that I could also feed to Ajax for a quick search.

The Code

Check out the code on GitHub

Demo

Sharing Azure Blobs on Azure Web Services


When deploying to Azure Web App Services:  Web App > Application Settings > Connection Strings, name is: storageConnectionString, value:  string copied from container assets, type: Custom

Continue Reading

Why Watch Coders Stream Live

I began hearing about  live code streams a year or so ago on LiveEdu.TV and saw a livestream with Jeff Fritz at DevIntersection, but I decided to become a regular on a stream DevChatter a few months ago to really see how it could improve my own code.

Build a Community

I specifically joined the DevChatter stream because they had a Discord chat.  I wasn’t familiar with Discord, but I’ve spent time on IRC.  I was expecting 3 months of ignoring, bad advice, trolling to make me go away, you know – the standard IRC vetting experience.  DevChatter’s Discord was actually VERY welcoming!

I like that they have a General chat but also VERY specific chats, like #azure, #dotnet, #php  and..  #rants.

Regular dev’s go onto Discord asking for random code help, spit ideas off each other or just to rant about the problem of the day:  the bug that wouldn’t go away, the pains of working with legacy, the random programming problem that won’t leave your mind…

Every portion of that Discord chat lends you a bit of insight into this person.  You figure out what timezone they are in, what languages and systems they work with.  You start to know these users not just as chatters, but as developers, as everyday people, working and programming just like you.  It is a community working together to improve their code.

Learn Your Environment

I work in Visual Studio all day.  I code in Visual Studio, research on Firefox, debug on Firefox and back to Visual Studio.  On my most focused days, nothing else exists.

But, I’m still quite new to VS.  I’m not completely sure what CodeRush or Resharper might offer me and I’m not even sure what I WANT in an environment.  That is, until I saw someone else work in it.

If I pick up nothing else, watching an live code stream gives me the experience of seeing how quickly and efficiently an experienced programmer works.

A live coding stream puts you face to face with an environment in real-time and makes you rethink your choice of IDE, extensions, plugins, etc.  It makes you want to make your own experience as efficient as possible.

One stream, I got completely obsessed with the comment code and how a TODO comment stood out differently from a regular comment.  I commented on this on livestream and I got various suggestions on how to make it happen.

There are constant comments every stream about what extensions to use, Visual Studio vs Visual Code, etc and each time, it is someone is discovering a way to improve their environment.

Conquer Your Imposter Syndrome

Some of the best streams I’ve attended were a struggle to just get going.

  • Imported library wouldn’t work.
  • Firefox error message is vague.
  • Project is getting too big for the logic behind it…

Speak Up

When live coding, the community takes every chance to offer their own experience to help.  It can be a simple..”err, I got that error message before.. I was missing a JS file..”  or it can be a more complicated logic refactor suggestion.

When errors happen on live stream, you have this urge to just spout ideas.  Your doubts about your expertise are less important – you’re just trying to help solve this!  Everyone understands.

Act

I saw a DevChatter fail with a 3rd party library, fix it and file a GitHub issue.  Though version control and GitHub have long been in my work process, I never got comfortable filing issues.  As a sole full stack developer seeing him do this live made me just a bit more confident to speak up.  I finally filed my own first issue on a library I work with last week: Love Ya, Mads! (Libman)

Be Confident

Everyone gets stuck and Googles, StackOverflows and sometimes narrow it down on a CodePen route.  You learn you’re not alone.

Live coding is a great environment to simulate the pressure of creating an app and fixing a bug live.  The only difference is that the satisfaction is shared by everyone on the livestream, too!

No Pressure

What I also like about live code streaming is access to this level of a professional coding community without the pressure of always participating.

If you’ve attended conferences, names you know, like: JeffFritz – runs a great streaming channel.  VisualStudio started their own Twitch channel not to long ago and I’ve also seen JamesMontemagno stream recently.  I latched onto the DevChatter community.

But, I’m mostly a lurker.

I’m usually coding during the day for work and put a stream off to the 2nd or maybe half screen.   I’m often not even sure how long I can stay.

This doesn’t mean I can’t learn anything off that stream!

  • Maybe a couple of devs had a random fight of F# vs C# and I get some new tips on F#!
  • Maybe the 30 minutes I do see teaches me a new way to debug JavaScript.
  • Maybe we all just bag on the obscene use of var and we all get a little more strict on our typing.


Those are the reasons I keep it on and will continue to participate in live code streams.

Continue Reading

Print PDF’s on Azure Using an API and RazorLight (Update 1)

The API mentioned in my first tutorial got taken down and so I had to do some updates.  First, choose another 3rd party API.  I currently am trying out  HTML 2 PDF Rocket and modified my code a bit:

[HttpGet]
public async Task<FileStreamResult> PrintAsync(int id)
{
    InvoiceVM invoiceVM = new InvoiceVM();
    invoiceVM = invoiceRepository.Get(id);

    var engine = new RazorLightEngineBuilder()
      .UseFilesystemProject(_hostingEnvironment.WebRootPath + "\\pdf\\")
      .UseMemoryCachingProvider()
      .Build();

    var view = await engine.CompileRenderAsync("PDF.cshtml", invoiceVM);
    string apiKey = "xxxxxxxxxxxxxxxxxxxx";

    using (var client = new WebClient())
    {
        // Build the conversion options
        NameValueCollection options = new NameValueCollection();
        options.Add("apikey", apiKey);
        options.Add("value", view);
        options.Add("MarginLeft", "10");
        options.Add("MarginRight", "10");
        options.Add("MarginTop", "10");
        options.Add("MarginBottom", "10");
        options.Add("PageSize", "Letter");

        MemoryStream ms = new MemoryStream(client.UploadValues("http://api.html2pdfrocket.com/pdf", options));

        return new FileStreamResult(ms, "application/pdf");
    }
}

This is based directly off the HTML 2 Rocket documentation.  For the rest of the code see the first tutorial.


Continue Reading

.Net Core – Drop Down (Select) Won’t Populate

I had a recent bug that took me much too long to solve and the root of the cause was me. I got a bit too delete happy and deleted a crucial file that allows me to use Razor Tag Helpers to bring a List into a View as a Drop Down (Select).

The Error

Here’s how the error presented itself:

  • SelectList won’t populate
  • Select or DropDown is empty
  • value = Microsoft.AspNetCore.Mvc.Rendering.SelectList or
  • System.Linq.OrderedEnumerable2 [Microsoft.AspNetCore.Mvc.Rendering.SelectListItem, System.String]
Continue Reading

I’m a Front-End Cheater

I am a full stack developer. I develop in Visual Studio, code in C# with .NET Core, deploy to Azure and I must admit, I’m a front-end cheater.

Comeon, the .NET Core Web App demo itself loads with Bootstrap and JQuery preinstalled. We’re all cheaters at some point, but I’m trying to diversify my cheating and eliminate my dependencies.

Here’s my latest strategy.

Continue Reading